Tuesday, January 31, 2012

Lasagna ala Dyta

I've always wanted to try to make lasagna.. I knew the concept, but never had the time (or effort) to make it. So, I decided to make it last Sunday. I didn't browse any recipes this time, only created my own recipe..  Alhamdulillah it turned out nicely :).

Here's my recipe :

1. Meat Sauce


Meat Sauce
Actually this recipe is a modification of my mom's spagetti sauce recipe :
Ingredients :
1/2 kg Ground beef
3 large tomatoes and 1 carrot, blendered
250 gr Shredded Cheddar cheese
1 tbsp Tomato Sauce
1 tsp Tomato Paste
Half an Onion, chopped
2 cloves of garlic, minced
Olive oil and butter
2 bayleaves
1 tbsp oregano
1 tbsp blackpepper
salt and sugar to taste

Directions :
Saute the onions until golden brown, add in garlic, stir for a couple minutes. Add the ground beef, cook till color changes, add a little water. Add tomato sauce, tomato paste, bay leaf, tomato&carrot juice, and all the other ingredients, cook until meat is tender and the sauce is thickened in a low heat.

2. Cheese Sauce also known as Beschamel Sauce
Cheese Sauce
Ingredients :
250 ml fresh full cream milk
250 gr cheddar cheese
Canned mushrooms (optional)
1 tbsp cornstarch
Half an onion, chopped
2 cloves of garlic, minced
Olive oil and butter
1 tbsp blackpepper
Salt to taste

Directions :
Saute the onions and garlic, add in the cornstarch stir through until dissolved. Add the mushrooms, stir until cooked, then add milk, cheese, and other ingredients. Cook in a low heat until sauce thickens.

3. Cook Lasagna as in the direction in the box til al dente.

4. Assembly the lasagna in a heatproof pan, starting with a layer of lasagna, meat sauce, cheese sauce, lasagna, over and over until all the ingredients are finished, topped with the cheese sauce, and sprinkled with more cheddar or mozzarella cheese.
Assembly the Lasagna

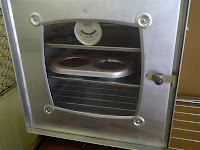
5. Bake the lasagna in a preheated oven of 180 C, for about 35-40 minutes, or until cooked through.


Bake in a preheated oven

Garnish the Lasagna, Ready to eat..:D


6. You should wait a couple of minutes (or until the lasagna is cooled down) before you cut the lasagna, or else it wil turn out runny.

The Layers of My Lasagna

Choco Lava Cake a.k.a Chocolate Foundant

Weekend is cooking day for me.. So last Saturday I decided to make a choco lava cake. So I searched the internet, and found this recipe. The owner of the blog said this is Gordon Ramsay's Recipe, so if my cake turned out bad, blame it at Gordon.. haha..

Here area the steps :

First, melt the butter and chocolate ini a hot pan on top of a sauce pan filled with boiling water. Stir the chocolate and butter until all is melted and combined. Be careful not to let the chocolate mix boil. Set aside, and let it cool.


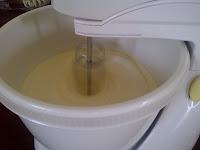
   Whisk the eggs with an electric mixer in  high speed til pale and stiff, pour in chocolate mixture, and mix it well using a spatula. Add the flour a little by little, and keep folding the mixture with the spatula until the mixture is combined through.

This is how it will look..

Prepare the ramekins (i don't have any ramekins, so I use cupcake pans) by spreading each with butter and dusting it with cocoa powder.


Pour in the chocolate mixture, about 3/4 of the height.


   Put in a preheated oven about 180 C, for about 10-12 minutes (depends on the oven, my oven took about 25 minutes). 


You'll know if it's ready if you poke the side of the cake with a small stick and none of the mixture sticks.
 Last but not least, garnish your cake with whipped cream or ice cream and fruits as you like..
Tada! Chocolate Lava Cake is ready to eat.. Nyum Nyum!!

Tuesday, January 24, 2012

Bathroom Renovation

In my earlier post, I said that I'm doing a renovation, i promised to show the results, well, here they are :
We had to install a blower for the air circulation

The mosaic tales and the sink in the making

Tada! This is what it looks like..:)

Looovvee the shower

The sink

It turn out pretty much as I expected, and even better.. Yay! Thanks so much Datuk for your help... :)! Actually, for the sink (washtafel) i wanted the "bowl" type, but it's too expensive and our renovation was running over budget, so we had to suit with this one. But there's no mirror yet on top of the sink, and  i don't have a picture of the toilet yet either. I'll update you in that later..:D.

Bake A Cake

Hey there, how was your long weekend? Did anything special? Well I decided to once again test my cooking skills by making a cake.. haha.. The cake i chose to bake was a tiramisu.. Since this is my first time baking, i have to buy some baking necessities like :

  1. Mixer
  2. Oven
  3. Spatula's
  4. Large bowl
  5. Baking pan
So, i convinced hubby to take us to Palembang, to buy all my needs and just to take a break from the small city..haha..

Coz this is my first time to bake, and dunno if i'm good at it,  i just bought a middle quality mixer, a Miyako brand. Hubby said that i should buy a philips  but i thought, nah, probably later when i became good at baking, i"ll ask hubby to buy me a new sophisticated mixer haha..

As for the oven, i chose a traditional stove oven, coz it's more cheaper with the gas. The price of an electrical oven is that much different with a stove oven, but it's a lot more expensive on the electricity (high watt).

So, with high spirit i started baking my cake with hopes too..

In the end, it turn out pretty nicely..:). Hubby said presentation wise, i get a 9, taste wise, hhmm.. needs some improvement..haha.. The texture of the cake wasn't as "full" and a bit too fluffy, but i think it tastes pretty good..haha.. Well, at least Kia likes it..:D.


Caking in d making..:D

Tada! My yummy cake..slurp!!

Wednesday, January 18, 2012

Home Renovation

Alhamdulillah Hubby and I have purchased a house in Jakarta. The house was actually hubby's grandma's house, but she wanted to sell it, so we purchased it for a pretty fair price..:). The house is located at Bintaro, but not in the sectors yet, the nearby area is called rempoa and also near by the public cemetery tanah kusir.

The house is a two story house with 6 bedrooms and 3 bathrooms. But, since it's an old house, it needs lots and lots of renovation.. *checking bank account* Rrrr....

Anyways, I have lots of plans in my mind for this house. How's it gonna be, the layout, the interior design, etc.. The main things that I would like for my dream house are :
  1. A foyer
  2. A walk in closet in my bedroom, that'll b connected straight to the bathroom
  3. A bathtub in my bathroom, with hot water
  4. A kitchen set complete with a minibar, so i can bake cakes
  5. Another kitchen for cooking daily meals (in Bahasa we usually call it dapur basah)
  6. A praying room (musola)
  7. A library/work room
In terms for the interior design, I'd like it to be a combination of modern minimalist and naturalist.. (haha, still can't prefer which one i like more).

So, due to the budget, we started to renovate one bathroom first, which is the bathroom downstairs. Since the old bathroom has small space, I wanted to keep it simple, so I chose black and white tiles for the theme.
I wanted a black and white theme like this
The details I wanted were this :
  1. All the walls were cover with tiles, from the floor to the ceilings.
  2. 3 walls were covered by white tiles, and 1 wall covered by mosaic tiles (black, grey and white combination)
  3. I wanted the floor to be covered by black or gray tiles, made of natural rocks, and the shower floor to be made by natural pebbles.
  4. White toilet and white sink.
  5. A towel hanger made by stainless steel
  6. A huge mirror to make the room seem larger
The little pebbles in the shower were like this
Mosaic Tiles
Since I still live in Prabumulih, we asked a favor to my father in law to supervise the renovation. I wish I could be there and buy and choose the tiles and other stuff myself, but i guess i have to try to believe in others..hohoho.. Hopefully the result is as I expected, or even nicer.. Aamiin.. I'll give you the pictures when the bathroom's done..

Next project : Kitchen set, walk-in closet, maid room
Budget : *overexceeded* aaarrrggghhh....


Tuesday, January 17, 2012

Making Pizza (Warning : Not As Easy As It Seems)

So, last Saturday I decided to make pizza. The idea came from Tomoko, my neighbor who likes to bake all kinds of cake and pastry. So I searched the internet and found this pizza dough recipe and this pizza recipe. After reading the steps over and over again, I thought, "ok, this is gonna be a piece of cake".

So, i went to the shop to buy the ingredients. This is what I bought for my pizza recipe :

  1. Wheat Flour
  2. Instan yeast
  3. Ketchup (tomato sauce)
  4. Sugar and salt
  5. Sausages
  6. Canned Mushrooms
  7. Greenbell Peppers
  8. Ground beef
  9. Onions
  10. Chedder cheese (prefer mozzarella, but theres none in Prabu..*cry*)
  11. Garlic
  12. Olive Oil
Kia Helping Me With The Dough :D
The first step was making the dough. It's a little hard to determine when the dough was ready, coz it always seemed too sticky, no matter how much flour I added. Well, at the end, it turned out like this.. (after an hour, it rose up) :


The Pizza Dough After It Rose Up

Meanwhile waiting for the dough to rise up, i prepared the toppings. First of all, I prepared the ground beef, here's what i did :
  1. Cut the onions into small bits, and also chopped the garlic.
  2. Sautee the onions first with a little bit of olive oil then toss in the garlic. Stir until both are caramelized and turn brownish gold.
  3. Then add the ground beef, continue stirring until the beef is cooked and all the juices come out. You can add a little bit of water to prevent from burning.
  4. Then last but not list season it with salt and black pepper.
Besides the ground beef, all the other toppings i just cut into smaller pieces. Here's a look at my toppings :

The Toppings

After and hour, my dough has risen, so it was a sign that it was ready. So I took about a half of the dough, then started to spread it out on a plate, put on the toppings, and tad a! This is what it looks like..:)

Right Before Tossing it In The Microwave
Daddy Making His Own Pizza


Yup, so i thought so far so good, everything is right on track, now's the time to bake the pizza..yay!

Pizza Baking in the Microwave, smelling yum yum!

The problem is, I don't have an oven, but I do have a microwave. So I thought, "what's the difference?". Despite of what hubby said that it won't work, me being stubborn as I am, still continued the process, and cooked the pizza in the microwave. When it cooked, the aroma was so delicious I was so confident with my pizza.. And this is how it turned out :

My So Called Pizza..:D *still yummy though!*

What?!! The toppings were all burnt, but the pizza dough wasn't  cooked enough. No no no!! Argh.. How could this be??! So, I went too check the internet again, searched for "Cooking Pizza With A Microwave". Turns out that hubby was right, you can't cook pizza with a microwave, unless you want your pizza dough too turn out all gooey... hhmm..

Oh well, at least I got a lesson learnt.. And the pizza actually tastes good too.. LOL..*self defense*

Next Project : Making Tiramisu Cake
Must Have List : Oven, mixer, measuring scale

Friday, January 13, 2012

Lebaran Idul Adha 1432 H

Idul Adha 1432 H was our first Idul Adha alone as a small family. The holiday was at a Sunday, coz i don't have anymore days for annual leave, we decided not to go to Medan nor Lampung and just have the holiday at Prabumulih.
Before Going to The Mosque

Kia Pouting coz We Didn't Take Her with us To The Mosque.. Haha.. So Cute..


Just The 3 Of Us..;)

So, even though it was just gonna be the three of us, I wanted to make our home as festive as possible. So I had Mbak Mala took cook special lebaran dishes like Ketupat (a kind of rice cubes wrapped in coconut leaves), Opor Ayam (Chicken with Coconut Milk Gravy), Sayur Lodeh (Vegetable Stew), Sambel Goreng Ati (Chilli Chicken Liver with Potatoes), Tauco Cumi (Stir Fry Squid with Fermented Soybeans Sauce) and Beef Rendang.. hhmm.. so yummy..:)

Our Lebaran Dishes.. Yummy...

At the morning of Idul Adha, we went to the Mosque to say our Idul Adha prayers. Too bad Kia couldn't join us coz she was still little, so she stayed at home with her Nanny..

Playing With Mama

Playing with Daddy

After doing our prayers, we went home to break our fasting, with eating all those delicious dishes!! nyum..nyumm..!! There it is, even though it's just the three of us, we could still make our home full of joy at Idul Adha.. Alhamdulillah..:)


The Drilling Family :D


Well, for you who don't know, I work at a Drilling Company.. You know, the ones who drill holes wells in the ground, to create oil wells, so that the oil in the ground can be sucked out.

So, to introduce hubby and my baby K in what I do for a living, I took them to visit one of our rigs, which  is located near our home. The rig we visited was N80B1/27, 1000 HP.

Having a safety induction before site visit


We left Kia with Mas Hakim (Rig Superintendent) at the Camp..Haha.. Sorry mas Hakim..:D


I also took Angku (my father) to visit the same rig, when he came to Prabumulih to visit us..:)
Angku & Kia in Front of The Rig 

Eating at the Rig Catering

Mas Ardian (Rig Superintendent) explaining Angku the Drilling Process @ the Rig Office

Location : Rig N80B1/27, Prabumulih
Time & Date : Noon, Forgot when, between July-September 2001 :D

Thursday, January 12, 2012

Travelling With A Baby (Airplane)

On my previous post I gave you tips on traveling with a baby by car, now i'm gonna give you tips on traveling with a baby by plane..:).


Travelling Tips :

  1. Actually, a baby as old as one day is ok to fly by plane, but what must be considered is that a newborn baby's immune system hasn't developed fully, so there'll be higher risks that your baby may catch germs and viruses such as the flu in the plane coz the air circulation is in only one place (in the plane). So it's better to consult with your pediatric first before flying if you're not sure. Kia herself made her first flight at the age of 3 months, and Alhamdulillah was fine..:).
  2. If you're concerned that passing the metal detector door at the airport will effect your baby (or baby in the belly), don't be. Metal detectors are perfectly safe and don't spread any radiation, they only detect metal with a simple signal. The only radiation there is, is at the X-Ray table for your luggage (you're not planning to go in there, right? LOL).
  3. A couple of hours before boarding, try  to give your baby some fruits like oranges, so that she can take a poo before take-off, it'll be very stressful to have to change a diaper in the airplanes lavatory.
  4. Just in cased of a delay (which commonly occurs in Indonesian aviation), don't forget to bring your baby's favorite toys to cheer her up.
  5. When checking in, it's best for you to ask a seat by the window, so for you breastfeeders, you'll have some privacy.
  6. The sayings that you should put earplugs or even cotton in your baby's ears is just a myth. The pressure difference from onshore to the air will not damage your baby's ears, it will just make your baby feel uncomfortable, which will lead to a baby cry-out.
  7. To avoid the uncomfy feeling, right before take-off and right before landing, you should breastfeed, or give milk or give your baby something to swallow, so that her ears won't be stuffed. Just like you're offered candies right before take-off, to ease off the uncomfy feeling in your ears.
  8. Don't forget to ask the stewardess for a baby kit.
  9. If you're bringing a baby stroller with you, it's ok for you to bring it to the plane (don't need to check it in the baggage), some airlines make you leave it right in front of the plane door, some make you leave it besides the plane stairs. The airline staff will take it right away, and you could claim it again when you've landed at the stairs or at the baggage claim.

Well, that's about it I guess, have a nice flight.. bon voyage..:))!


Travelling with A Baby (Roadtrip)


Here are some tips I could give you when traveling with a baby by car (road trip) :
  1. Use a car seat. It would be really convenient (and safe) if your baby is willing to sit in a car seat. Actually in foreign countries its against the law to bring a baby in a car without a car seat. But in Indonesia, there is no law for babies in car seats, so if your baby screams to the top of her lungs when put in a carseat, for safety you should ride in the back seat with your baby. If you're not using a carseat, you should bring extra pillows to support your baby on your lap so it wouldn't be too tiring for you.
  2. If possible, bring a friend or caregiver with you so you can take turns carrying the baby.
  3. Try to stop every 2 hours to straighten your legs and take a breath of fresh air.
  4. Prepare a bag filled with baby necessities such as : a couple of baby diapers, baby wipes, change of clothes for the baby, small baby toys, baby toiletry such as : eucalyptus oil, lotion, cologne, small washcloth, if you're formula feeding bring 2 or 3 bottles, with its brush and soap to clean it, the milk in a small container, hot water.
  5. For you and your partner, you should bring a couple of snacks and plenty of fluid (especially mineral water), just in case you get hungry and there's no place to eat.
  6. Bring a CD with you and your baby's favorite songs.
  7. Babies are real suckers for motion, so usually they fall right asleep when your car starts moving, if they do, you should get some sleep too.
  8. If your baby decides not to sleep, then you should prepare a couple of books, toys, or iPad filled with favorite songs and videos to cheer your baby up.
  9. If your baby is more than 6 months, then you'll have to prepare for her meals. If its not a big issue for you, instant baby food would be very convenient, coz all you have to do is pour in hot water. Buy the ones in sachets so its easier to bring and you don't have to keep any remains. 
  10. If your committed to give your baby fresh foods, then you can prepare her meal (like soup, porridge, puree or so) before you leave, put it in a couple of separate containers (each for one meal), and it could probably last for 6-7 hours without turning bad. When you stop to eat in a restaurant, buy some fresh cut fruits for your baby's snacks on the road.
  11. In every stop you make, wash all the baby's bottles and dishes. And don't forget to change the baby's diapers..:)
Well I guess those are the tips I can give you, have a nice trip and drive safely ;)!


Wednesday, January 11, 2012

Travelling

I love travelling.. Since I was little my family always had a family vacation every year, just the four of us. One of a must to do in our family.. Just to relax, refresh and catch up with each other..:). Didn't have to be anyplace to luxurious, as long as it's somewhere out of town.. Luckily my hubby has the same hobby as I do, so I can do my hobby with my little family..:)

I love experiencing new places, with their different cultures, explore new local culinary, enjoying n relaxing the view and scenery..hhmmm.. Seems like we should plan another vacay *poke hubby*


Haha..so many pictures i couldn't decide which ones to post..:D... Well, these are a couple of pictures of me traveling with my hubby and family..:D.


Locations : Palembang, Lombok, Gili Trawangan, Mekah, Madinah, Jeddah, Langkawi, Jakarta, KLIA, Mallaca, KL, Lampung, etc..
Year : 2008-2011